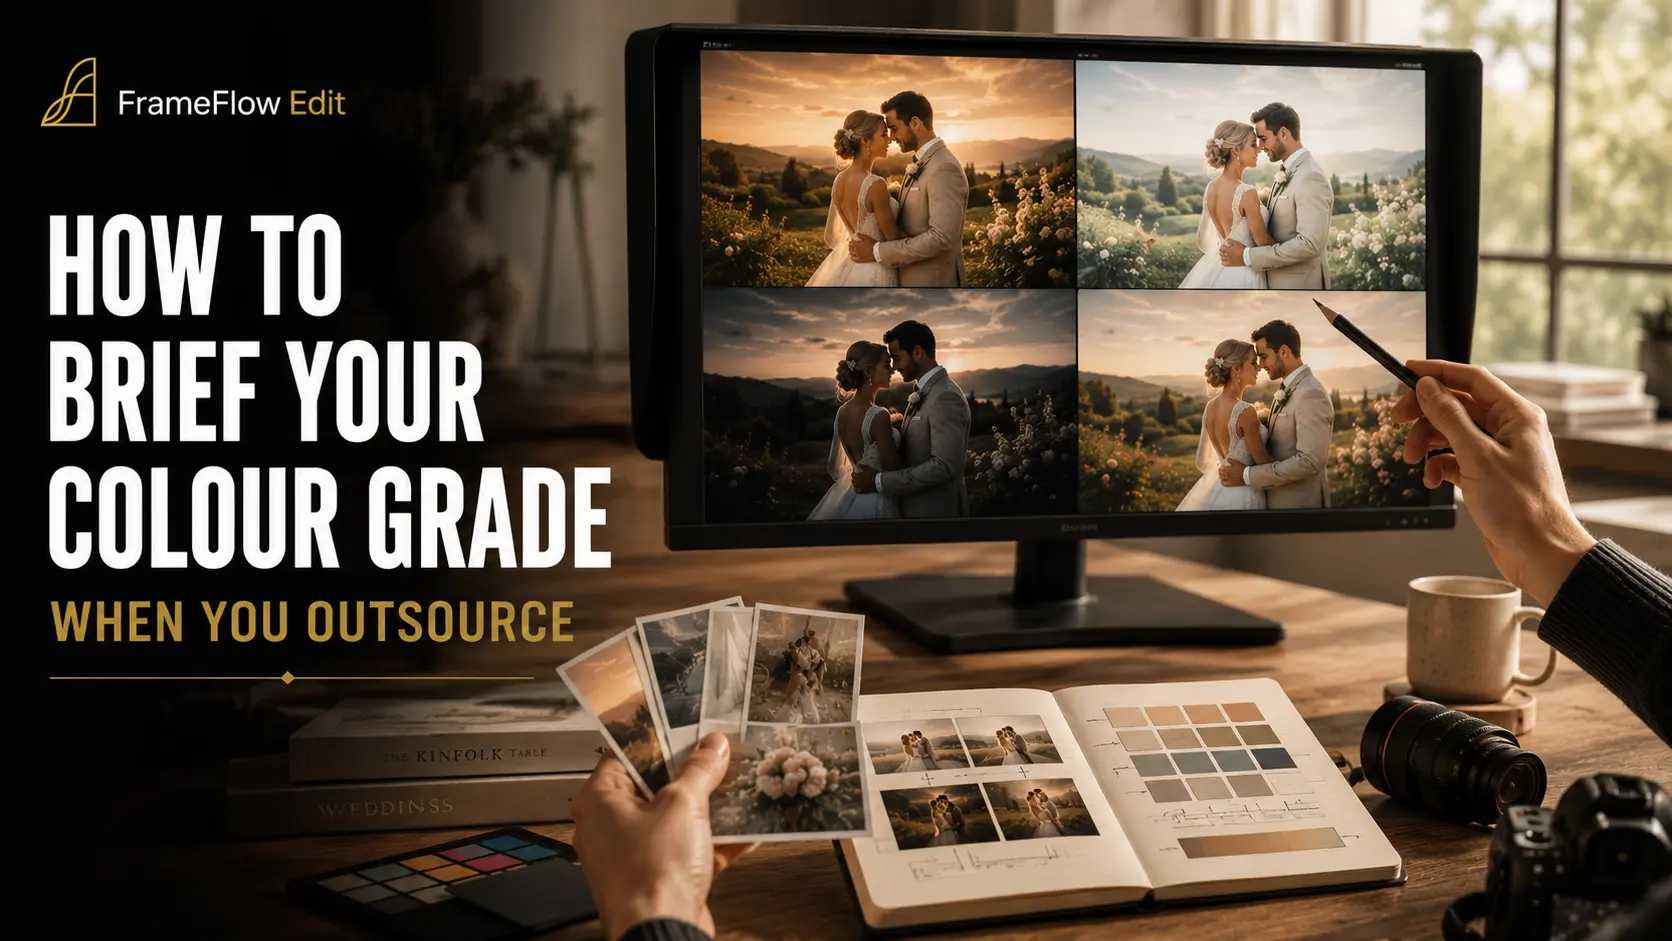
Why a Colour Grade Brief Is a Non-Negotiable Handoff Document
Send your footage without a colour brief and you are essentially asking your editor to guess — and professional editors make educated guesses, not cheap ones. The result is a grade that misses your aesthetic, a round of revisions that eats two or three days, and a delivery date that slips past the promise you made to the couple. When your turnaround window is twelve days, a single unplanned re-grade can collapse the entire schedule. A vague brief is not a small inefficiency; it is a structural risk to your business.
The colour grade brief is a separate deliverable from your edit brief. Where the edit brief covers story arc, song choices, and pacing, the colour brief answers a different set of questions entirely: What is the target look and mood? How should skin tones sit? What happens to the highlights — do they bloom softly or hold detail? These two documents travel together in your footage handoff package, but they must never be merged into a single vague paragraph. Keeping them distinct forces you to think deliberately about each layer of the film — and it gives your editor two clear reference points rather than one muddled instruction set.
The stakes are highest on a wedding day because the footage is irreplaceable and the lighting conditions never stop changing. A ceremony shot in directional 11 a.m. light, a reception hall drenched in amber uplighting, drone clips in golden hour haze, and handheld dance-floor footage under coloured LEDs — all of that can land in your edit timeline from two or three different cameras with different colour science baked in. Without a written brief, each clip risks drifting toward a different look, and the final film feels inconsistent no matter how talented the editor is. A structured colour brief is what holds the whole film together as a cohesive visual story, not just a sequence of well-exposed shots. For a deeper look at what separates a technically correct grade from one that actually feels cinematic, see what makes a wedding film cinematic and our guide on how to brief a video editor to match your wedding style.
Bottom line: treat the colour brief as a non-negotiable handoff document — not an optional note you dash off in a text message. The fifteen minutes you invest in writing it will save you far more in revision cycles, client emails, and late-delivery stress.
Colour Correction vs Colour Grading: Know What You're Asking For
Most videographers use "colour grade" as a catch-all phrase, but what they actually mean is a two-stage pipeline — and conflating the two stages is one of the most common reasons outsourced edits come back looking wrong. Understanding the distinction lets you brief each stage deliberately, so your editor knows exactly what problem they're solving at each step.
Stage one is colour correction. This is purely technical work: balancing whites so they are neutral, setting correct exposure across every clip, and ensuring skin tones render accurately regardless of the ambient light at the venue. Correction makes footage look like what your eyes actually saw on the day. It accounts for mixed lighting in a church, blown-out windows during golden-hour portraits, and the slight green cast from a reception marquee's LED fairy lights. No creative intent lives here — only accuracy. If you skip or rush correction, every creative decision made in stage two is built on a broken foundation.
Stage two is the grade. This is where the creative look is applied: a warm, golden-toned summer feel; a cool, desaturated editorial style; a rich, filmic look with lifted shadows; or the clean, bright aesthetic that suits modern destination weddings. The grade is what makes your work feel distinctly yours. It is the stage couples react to emotionally, and the one your editor needs the most guidance on. When you ask for "just a grade" without specifying the look, you are implicitly asking for both stages — but your editor has no creative reference to work from for the second one.
| Stage | What it fixes | What your brief needs to include |
|---|---|---|
| Colour Correction | White balance, exposure, skin tones, mixed lighting | Log profile used (S-Log3, V-Log, etc.), any problem shots flagged |
| Colour Grade | Creative look, mood, tone, stylistic consistency | Reference film or reel, LUT preference, warm/cool/filmic direction |
The order is non-negotiable: always correct first, then grade. Applying a creative LUT or grade to uncorrected, log-encoded footage means your scopes are lying to you — shadows that look crushed may actually be noise, and skin tones that appear fine under a warm grade could be completely off-neutral underneath. Reversing the order produces results that are hard to fix in revision rounds and often require starting from scratch. When you hand off your footage to an editor, specify which log profile or picture profile you shot in so correction can be applied correctly before any look is touched.
Once you are clear on the pipeline, briefing the grade becomes much more straightforward. Think of correction as giving your editor the raw clay, and the grade as telling them what shape to make it. For a deeper look at how look and style translate into a brief your editor can actually execute, see our guide on how to brief a video editor to match your wedding style — and if you are unsure what specific visual choices create the cinematic feel you are after, what makes a wedding film cinematic breaks down each element your grade needs to serve.
Declare Your Log Profile — It's the First Thing Your Editor Needs
Before your editor touches a single clip, they need to know exactly how your camera recorded the image. A log profile is a gamma curve that compresses a wide dynamic range into a flat, low-contrast file — preserving highlight and shadow detail that a standard picture profile would simply clip. The result looks washed-out and grey straight off the card, and that is entirely intentional. That flat image is the grading canvas: it holds far more tonal information than a "baked-in" look, giving your editor room to sculpt contrast, lift shadows, and push a cinematic grade without falling apart.
The critical thing to understand is that every manufacturer's log profile encodes that data differently. Sony S-Log3 distributes tones across a different curve than Canon C-Log3, Panasonic V-Log, Fujifilm F-Log2, or Blackmagic Film Gen 5. When an editor applies a LUT or transform designed for one profile to footage shot in another — say, an S-Log2 LUT over S-Log3 clips — the colour channels misalign completely. Skin tones shift orange or green, skies turn unnatural, and no amount of secondary correction fully rescues the image. Broken colours at this stage cost time, money, and client trust.
Your colour brief must therefore state three things without ambiguity: the camera body (e.g. Sony FX3, Canon EOS R5 C), the exact log profile selected in-camera (not just "log" — be specific), and the colour space or gamut used alongside it (e.g. S-Gamut3.Cine, Cinema Gamut, V-Gamut). These three data points let your editor set the correct input transform before any creative grade begins. For a full checklist of everything to include when handing over footage, see How to Hand Off Wedding Footage to an Editor.
| Camera Brand | Common Log Profile | Paired Colour Space / Gamut |
|---|---|---|
| Sony (FX3, FX6, A7S III, ZV-E1) | S-Log3 | S-Gamut3.Cine or S-Gamut3 |
| Canon (EOS R5 C, C70, C300 III) | C-Log3 (preferred) or C-Log | Cinema Gamut or BT.2020 |
| Panasonic (GH6, S5 II, BGH1) | V-Log / V-Log L | V-Gamut |
| Fujifilm (X-H2S, X-T5) | F-Log2 | F-Gamut |
| Blackmagic (Pocket 6K, Cinema Camera 6K) | Blackmagic Film Gen 5 | Blackmagic Wide Gamut Gen 5 |
| DJI (Ronin 4D, FPV, Inspire 3) | D-Log M or D-Log | DCI-P3 D65 |
If you shot a multi-camera wedding — say, a Sony FX3 as your A-cam and a Canon C70 as your B-cam — declare both profiles separately in your brief. A skilled editor will normalise them to a common working colour space before grading so the two cameras feel cohesive on screen. Never assume your editor will guess; a one-line note in your project brief eliminates the most common source of colour errors on outsourced edits. For guidance on shaping the broader creative direction you send across, read How to Brief a Video Editor to Match Your Wedding Style and What Makes a Wedding Film Cinematic.
Give Your Editor a Visual Reference, Not Just Words
When you tell an editor your footage should look "warm and cinematic," you've described roughly 80% of every wedding film ever submitted for outsourcing. Those words aren't wrong — they're just not actionable. A remote colourist working on your timeline has no frame of reference for what your version of warm looks like, and guessing costs everyone revision rounds. The fix is simple: replace adjectives with assets.
Send your editor three concrete references before they touch a single clip:
- A frame grab or still from a previous wedding — ideally a skin tone in natural light and a reception shot with mixed artificial lighting. These are the two hardest scenarios to nail consistently, and showing a graded example from your own back catalogue immediately anchors the target.
- A named LUT pack with your preferred intensity — if you work with a film-emulation or warm-wedding LUT (e.g. a specific pack from a trusted preset creator), name it and specify opacity. Asking for a LUT at 40–50% opacity rather than full strength is the single most effective way to avoid the over-processed look that dates a film within a year.
- A reference film or reel link — a Vimeo or YouTube link to a film whose grade you admire. Even if the editor can't replicate it exactly, it communicates intent: contrast curve, highlight handling, how much blue is left in shadows.
The 2026 direction in professional wedding colour is natural-yet-enhanced — warmer midtones that read as intimate and romantic, but with restrained saturation that signals quality. Over-saturated greens and heavily teal-shifted shadows feel dated; the look clients respond to now is one that could pass for a slightly elevated version of reality. A slightly pulled-back grade also preserves what matters most: realistic skin tones, the texture of a lace bodice, and highlight detail in a white dress that would otherwise blow out. These are the details clients pause on when they watch their film for the first time.
| Reference Type | What to Include | Why It Helps |
|---|---|---|
| Frame grab / still | Graded frame from a previous wedding (skin + mixed light) | Sets a concrete colour target for skin and highlights |
| LUT pack name + intensity | Pack name, version, and opacity (e.g. 40%) | Ensures consistent starting point; avoids over-graded result |
| Reference film link | Vimeo/YouTube URL with timestamp if relevant | Communicates contrast, shadow handling, and overall mood |
| Written notes | 2–3 sentences on what to avoid (e.g. "no teal shadows, keep greens natural") | Prevents the most common grading missteps upfront |
Pairing this visual brief with a solid file handoff makes the whole process seamless — see the complete footage handoff checklist for everything else your editor needs before they start. If you want to go deeper on communicating your overall aesthetic — not just colour, but cuts, pacing, and mood — briefing an editor to match your wedding style covers the full picture. And if you're still defining what your signature look actually is, what makes a wedding film cinematic breaks down the visual elements worth protecting in any grade.
Skin Tone Instructions Are the Most Important Line in Any Brief
Of everything you write in a colour-grade brief, the skin tone instruction carries the most weight. Audiences are wired to read human faces before anything else in the frame. They will never consciously notice that skin tones are correct — but they will wince, disengage, or leave a negative review the moment those tones tip orange, magenta, or ashen. One clear sentence about how you want skin handled does more to protect your final delivery than a paragraph about mood boards.
Start by telling your editor where the couple sits on the broad skin tone spectrum — fair, medium, or deep — because this directly shapes how the editor balances the Flesh Tone Line (FTL) on the vectorscope. The FTL is the diagonal axis that runs from roughly 10 o'clock to 4 o'clock on the vectorscope display. Healthy, accurate skin tones for every ethnicity should cluster along this line; the exact position along it shifts with complexion, but the alignment to the line itself does not. Significant deviation from the FTL is a diagnostic flag — it means a colour cast is present and must be corrected before any creative look (LUT, creative grade, film emulation) is applied on top. Skipping that primary correction and burying a cast under a stylised look is how skin ends up looking subtly wrong in a way even non-technical viewers notice.
Beyond the general tone, flag the scenes you already know will be tricky. Mixed-lighting situations are the most common problem in wedding work: golden-hour ceremony exteriors that cut to a tungsten-lit church interior, or a reception that blends warm practicals with cool DJ uplighting. In these cases, tell your editor which light source you want skin balanced to — typically the dominant or most flattering source — and whether the other sources should be neutralised or left to breathe as atmosphere. Also specify whether skin should read warm (a touch of amber or honey) or neutral (true-to-life without added warmth). These are subjective creative choices that belong in your brief, not left to assumption. For a fuller picture of what to include before footage ever leaves your hands, see our complete editor handoff checklist.
| Skin Tone Brief Element | What to Specify | Why It Matters |
|---|---|---|
| Complexion range | Fair / Medium / Deep (or describe both subjects if they differ) | Sets the target zone along the FTL on the vectorscope |
| Warm vs neutral preference | "Lean warm — honey tones" or "Stay neutral — true-to-life" | Prevents the editor from making a stylistic call that clashes with your brand |
| Tricky scenes | Name the specific clip or location (e.g. "golden hour ceremony exterior", "dark church interior") | Flags mixed-light situations that need deliberate primary correction |
| FTL cast check | Confirm deviation from FTL must be fixed before any creative look is applied | Ensures the base grade is technically sound before stylisation |
Getting skin tones right is also inseparable from your broader visual identity. The way skin renders under your chosen grade — warm and filmic, cool and editorial, clean and natural — defines how couples and venues perceive your work at first glance. If you haven't yet defined that identity in brief form, briefing an editor to match your wedding style walks through the full process. And if you want to understand why technically correct skin tones underpin what viewers describe as a "cinematic" look, our breakdown of what makes a wedding film cinematic covers the perceptual science behind it.
Multi-Camera and Mixed-Light Weddings Need an Extra Briefing Layer
Multi-camera weddings are among the most technically demanding briefs an editor receives — and the colour grade is where that complexity bites hardest. A Sony FX3 shooting S-Log3, a Canon R5 in C-Log2, a DJI drone in D-Log M, and a second shooter's mirrorless body at ISO 6400 under tungsten church candles are all arriving at the timeline with wildly different starting points. Without an explicit briefing layer that addresses each source, your editor will spend half the grade just normalising footage instead of crafting the look you envisioned.
Your brief for mixed-source projects should answer three questions upfront: which camera bodies and log profiles were used on each source, whether a colour chart (X-Rite, DGK) or grey card was used during the shoot, and which specific scenes have known white-balance challenges — outdoor ceremony suddenly moving indoors, LED reception uplighting, or the notoriously green-magenta flicker of older church fluorescents. The more precisely you flag these in your handoff notes, the faster your editor can apply the right correction before a single creative decision is made. For a full breakdown of what to include in that handoff, see our guide on handing off wedding footage to an editor.
| Source Type | Common Starting Problem | Brief Should Specify |
|---|---|---|
| Primary cam (Sony/Canon log) | Flat, desaturated, correct exposure | Log profile + any in-camera LUT applied |
| Second shooter (different body) | Different sensor colour science | Body model, log profile, ISO range used |
| Drone footage | D-Log M or D-Log, cooler skies | Drone model, lighting conditions at flight time |
| Church / reception (mixed light) | Tungsten + LED + ambient mixed casts | Flag specific clips needing manual WB correction first |
The workflow that produces a cohesive film — rather than a patchy one — follows a clear three-step logic: normalise every source into the same working colour space (typically Rec.709 or a shared wide-gamut space), match exposure and white balance across all cameras so they read as one unified visual language, and only then apply your single shared creative LUT or grade pass. Skipping step one or two and jumping straight to the creative LUT is the most common reason multi-cam films look inconsistent. If you have a signature aesthetic you want maintained across every source, make sure your editor understands it — our article on briefing an editor to match your wedding style covers exactly how to communicate that vision. And if you want to understand what separates a technically clean grade from a truly cinematic one, what makes a wedding film cinematic is worth reading before you write your next colour brief.
Your Colour Grade Brief Template (Copy and Fill In)
Stop writing colour notes in a separate email thread that gets buried. Copy the table below into a Google Doc, Notion page, or your project management tool and fill it in before every outsourced edit. Paste the completed brief into the same folder as your footage — your editor has everything in one place, and you have a paper trail if revisions come up. Pair this with your full footage hand-off checklist so the grade brief never travels alone.
| # | Field | Your Notes | Why It Matters |
|---|---|---|---|
| 1 | Primary camera + log profile + colour space | e.g. Sony FX3 · S-Log3 · S-Gamut3.Cine | Sets the starting node/CST in DaVinci Resolve; wrong input transform = blown highlights from frame one |
| 2 | Secondary camera(s) + log profile | e.g. Canon R5 · C-Log3 · Cinema Gamut | Lets the editor build a separate node tree or apply the correct IDT per clip so cameras match on the timeline |
| 3 | Drone footage — yes/no + profile | e.g. DJI Air 3 · D-Log M · yes | Drone sensors have narrower dynamic range; knowing the profile upfront avoids muddy skies or crushed shadows |
| 4 | Reference look — link or LUT name | e.g. IWLTBAP Matte Wedding v2 / Vimeo link to reference film | A single reference image or film is worth 200 words of description — give your editor something to eyeball, not just adjectives |
| 5 | Skin tone priority — warm/neutral + complexion note | e.g. "Warm preference. Bride has deep melanin skin — protect shadow detail, avoid orange push." | Skin tone is the first thing couples notice; a one-line complexion note prevents the most common revision request |
| 6 | Tricky scenes — timestamps or segments | e.g. "Ceremony 14:22–16:05 mixed tungsten + LED; reception 2:08:00+ mixed coloured uplighting" | Flags the clips needing manual white-balance correction before the LUT lands, saving a full revision round |
| 7 | LUT intensity preference | e.g. "Start at 40% opacity, final call yours — flag if it fights the footage" | Gives the editor creative latitude while anchoring expectations; avoids an over-baked grade that neither of you likes |
| 8 | Delivery colour space | Rec.709 for all client deliverables (Vimeo, USB, online gallery) | Ensures the output transform is correct for SDR screens; mismatched output = washed-out or oversaturated delivery file |
A few notes on using this template effectively. For field 4, a Vimeo or YouTube link to a film whose grade you admire is the single highest-value input you can give — far more precise than writing "moody but warm." For field 6, you don't need exact timecodes if you haven't logged the footage yet; a rough description ("the church ceremony had mixed tungsten and window light") is still far better than silence. And for field 8, keep it simple: Rec.709 is the correct output colour space for every standard client delivery — streaming platforms, USB exports, and online galleries all expect it. Only deviate if you are specifically delivering HDR content to a platform that supports it.
Once your editor has this brief alongside the footage, there is almost nothing left to guess. For deeper guidance on communicating your overall aesthetic — not just the grade, but pacing, music feel, and story arc — see our guide on how to brief a video editor to match your wedding style. If you want to understand what a strong grade actually contributes to the finished film, what makes a wedding film cinematic breaks it down from an editor's perspective.
Five Brief Mistakes That Guarantee a Re-Grade Request
Even experienced videographers fall into the same briefing traps when they start outsourcing colour work. Each mistake below adds at least one revision round — and revision rounds cost you time, money, and the relationship with your editor. Run through this list before you hit send on any footage hand-off.
- Not declaring your log profile. If your editor doesn't know whether they're working with S-Log3, V-Log, or Log C, they'll apply the wrong technical LUT at the very first step. From frame one, every colour decision is built on a broken foundation — and no amount of tweaking will fix a grade that started with the wrong transform. Always state your camera model, log profile, and any custom picture profile in the brief, full stop.
- Sending only words with no visual reference. "Moody but romantic" means something different to every editor. Without a mood board, a reference film, or even three Lightroom-graded stills from your own past work, your editor is guessing at an aesthetic they've never seen. Words set direction; visuals set the destination. A single well-chosen reference image does more work than two paragraphs of adjectives.
- Forgetting to flag mixed-lighting scenes. A reception with warm tungsten candles, cool DJ uplighting, and a daylight window in the background is a colour-correction puzzle — not just a grade. If you don't call it out, your editor may spend the bulk of their time refining a ceremony exterior while the genuinely complex indoor scenes get a rushed pass. Your hand-off checklist should include a note on every problematic lighting environment you encountered on the day.
- Asking for a "heavy grade" without flagging delicate skin tones. Pushing saturation and contrast hard is easy; keeping skin tones looking natural while doing so takes deliberate masking and selective correction. If your brief says "cinematic and punchy" but you haven't mentioned that the bride has a very fair complexion or the groom has deep melanin-rich skin, you're setting up your editor to oversaturate faces — an error that reads as amateurish the moment a client sees it. Mention skin tone range explicitly, and consider linking a reference where the grade handled it well. See also what actually makes a wedding film feel cinematic — it's rarely about pushing saturation harder.
- Sending the brief after the footage is already uploaded. This one is surprisingly common: the videographer uploads the drive, then fires off a quick brief email hours later. By that point, an efficient editor may already be ingesting, organising, or even beginning a technical pass. A brief that arrives mid-edit creates confusion, causes rework, and signals disorganisation. Your colour brief should land with the footage — or ideally 24 hours before it. Pair it with a consistent style briefing process so your editor always has everything they need before they open a single clip.
The common thread across all five mistakes is timing and specificity. A brief isn't a formality you send to tick a box — it's a technical document that directly controls output quality. Get it right upfront, and a re-grade request becomes the exception rather than the rule.
How FrameFlow Uses Your Brief to Deliver a Consistent Grade
When you submit footage to FrameFlow, your colour brief isn't treated as a loose suggestion sitting in a notes field — it becomes the primary technical document that drives every decision from the first node in the grade to the final export. The editor reads the brief before touching a single clip: your chosen transform pipeline (log format, LUT or CST, target colour space), your creative look reference, and your skin-tone anchor are all pulled in together. That alignment at the start is what makes a white-label grade feel like your grade, not a generic pass from someone who's never shot a frame for you.
The brief directly shapes three layers of the grade. First, the technical transform — knowing whether you're handing off BRAW in Film mode, S-Log3, or V-Log means the editor applies the correct input transform immediately rather than guessing and wasting a correction round. Second, the creative look — your reference film, mood board, or named LUT tells the colourist exactly where contrast, saturation, and highlight roll-off should land. Third, the skin-tone anchor — a brief that specifies your typical subject's complexion and your preferred warmth/coolness bias means faces are locked before anything else moves, so every subsequent adjustment preserves that foundation rather than fighting it.
This is precisely why FrameFlow's 12-day turnaround is consistently achievable. Back-and-forth revision cycles almost always trace back to a missing or ambiguous brief — "make it warmer" is a full extra round; "push skin tones to Hue 30–35, lift shadows +0.3 stops" is a 10-minute tweak. A complete brief compresses the feedback loop to a single targeted review rather than an open-ended exchange. Pair your brief with a clean footage handoff — see our guide on how to hand off wedding footage to an editor — and you remove almost every source of delay before the grade even begins.
The most practical long-term benefit is reusability. Once you've built and validated your colour brief — matched it to your camera rig, confirmed it against a delivered film your client loved, and refined the skin-tone notes — it becomes a standing document you attach to every job. That single file is now part of your brand's consistency system: a new couple gets the same signature look as the last, and every editor who works with you, now or in the future, starts from the same calibrated baseline. Over a full season, that compounds into a recognisable visual identity that sets your portfolio apart. Ready to put your brief to work? Get a quote from FrameFlow and see how a clear grade brief translates directly into a faster, more consistent delivery for every wedding on your calendar. You can also explore how briefing extends beyond colour in our guides on briefing an editor to match your wedding style and what makes a wedding film cinematic.
Do I need to send a colour brief if I just want a natural-looking grade?
Yes — 'natural' is still a creative instruction that needs context. Include your log profile, a skin tone note (warm or neutral), and one reference frame so your editor knows what 'natural' means to you. Without it, they'll default to a generic Rec.709 conversion that may not match your brand at all.
What if I shoot in a standard Rec.709 profile, not log?
Standard Rec.709 footage can absolutely be graded — you just have less latitude before the image starts to break down. In your brief, note that no log conversion is needed, specify your target look with a visual reference, and flag any scenes with blown highlights or crushed shadows so the editor knows the limits of the material upfront.
Should I send my own LUT file to the editor, or just a reference?
Sending your signature LUT file is the fastest path to a consistent grade — it removes all ambiguity. If you don't have one, a link to a named commercial LUT pack plus a reference frame works well. Always specify the intensity you want (e.g. 40–50% opacity) so the grade doesn't feel overdone.
How do I brief a multi-camera wedding where each camera has a different log profile?
List every camera body and its exact log profile in the brief — for example, Sony A7S III on S-Log3 + Canon R5 on C-Log3. Note that each source needs its own technical transform before a shared creative LUT is applied. If you used a grey card or colour chart on the day, mention it — the editor can use it to normalise exposure across cameras quickly.
What delivery colour space should I ask for?
For standard client delivery (streaming, download, Vimeo, USB), Rec.709 is the correct output colour space — it's what every consumer screen expects. If your client specifically wants a cinema or HDR deliverable, discuss that requirement before editing starts, as it affects the entire grading pipeline.